WebSphere - PostgreSQL data source configuration
To configure a PostgreSQL data source in WebSphere, you need to complete a few steps:
- Install the PostgreSQL JDBC driver library in the appropriate WebSphere directory.
- Configure JAAS authentication aliases for the data source.
- Define a JDBC provider for PostgreSQL.
- Create a JDBC data source that will be used by applications running on the WebSphere server.
- Set connection parameters, such as the database name, server address, and port number.
- Configure additional connection pool parameters, such as the connection age limit.
- Apply the changes and start the WebSphere server.
- Test the connection to the PostgreSQL database to make sure everything is working properly.
Installing the JDBC driver library
To install the PostgreSQL JDBC driver library, you need to download it from an external file repository. The best repository with the required libraries is Maven2 Repository. To download the required version of the JDBC driver, you can use the following links:
<!-- https://mvnrepository.com/artifact/org.postgresql/postgresql -->
<dependency>
    <groupId>org.postgresql</groupId>
    <artifactId>postgresql</artifactId>
    <version>42.3.2</version>
</dependency>
<!-- https://mvnrepository.com/artifact/org.postgresql/postgresql -->
<dependency>
    <groupId>org.postgresql</groupId>
    <artifactId>postgresql</artifactId>
    <version>42.7.3</version>
</dependency>
The downloaded file should be placed in the installed WebSphere environment in the $WEBSPHERE_HOME/jdbcdrivers/PostgreSQL directory, where $WEBSPHERE_HOME is the full path to the installed WebSphere product. Below is an example of the procedure for installing IBM BAW 21.0.3:
export WEBSPHERE_HOME=/opt/IBM/BAW/21.0.3
mkdir -p $WEBSPHERE_HOME/jdbcdrivers/PostgreSQL
cd $WEBSPHERE_HOME/jdbcdrivers/PostgreSQL
wget -b -t0 https://repo1.maven.org/maven2/org/postgresql/postgresql/42.3.2/postgresql-42.3.2.jar
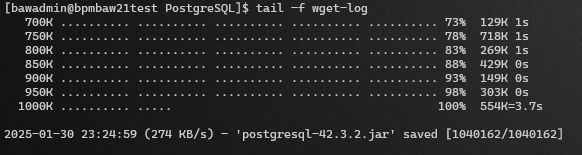
It is very possible that you will encounter an SSL error similar to the one below while downloading the file:
[bawadmin@bpmbaw21test PostgreSQL]$ tail -f wget-log
--2025-01-30 23:23:01--  https://repo1.maven.org/maven2/org/postgresql/postgresql/42.3.2/postgresql-42.3.2.jar
Resolving repo1.maven.org (repo1.maven.org)... 146.75.120.209, 2a04:4e42:8e::209
Connecting to repo1.maven.org (repo1.maven.org)|146.75.120.209|:443... connected.
ERROR: The certificate of 'repo1.maven.org' is not trusted.
In such a case you can use the --no-check-certificate option in the wget command to ignore certificate problems. Example:
wget -b -t0 --no-check-certificate https://repo1.maven.org/maven2/org/postgresql/postgresql/42.3.2/postgresql-42.3.2.jar
Configure JAAS authentication for the data source
We log in to the WebSphere administration console as a user with the administrator role. We do this using a WWW browser by entering the address (usually, to make sure what the specific address is, contact the system administrator/installer):
https://<server_name>:<port>/ibm/console
Sample of server address: https://localhost:9043/ibm/console
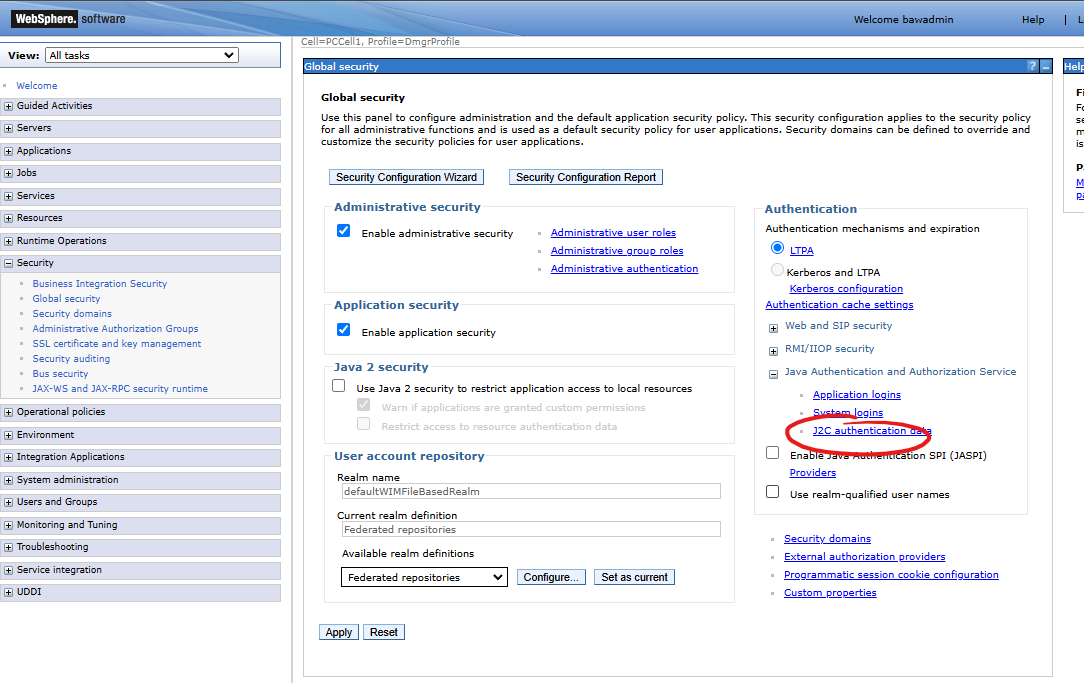
After logging in, go to the JAAS authentication alias configuration form. Go to the following path (starting from the left-hand menu): Security > Global security. On the opened page, look for Java Authentication and Authorization Service (JAAS) - click on "+" (expand the category) and select the J2C authentication data link:
We will appear on a page presenting a list of defined credentials (aliases representing "user & password" pairs):
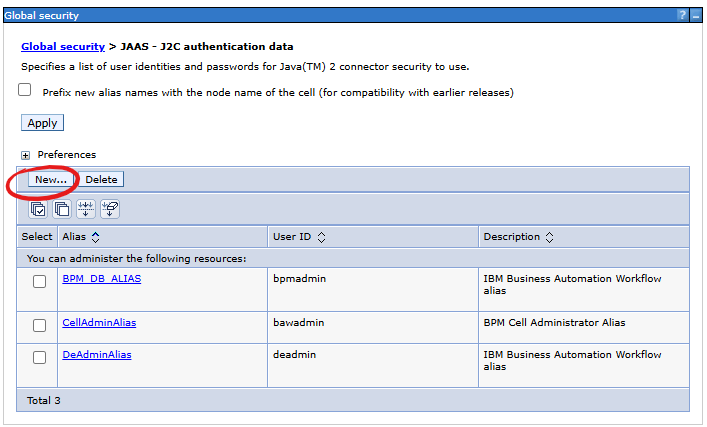
We define authentication to the PostgreSQL database (using the Mercury system database user as an example):
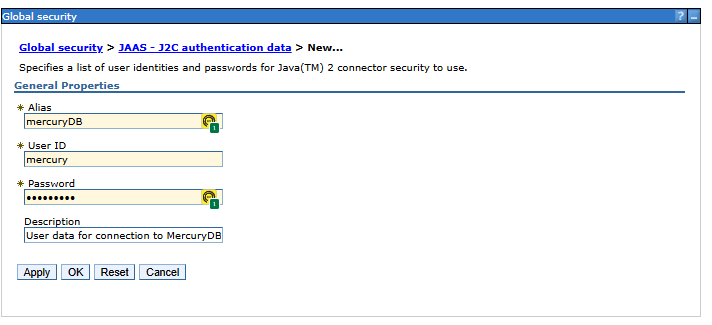
- Alias: mercuryDB (alias name - we will use it later when defining the data source)
- User ID: mercury (database user name)
- Password: secret (database user password)
Defining a JDBC provider
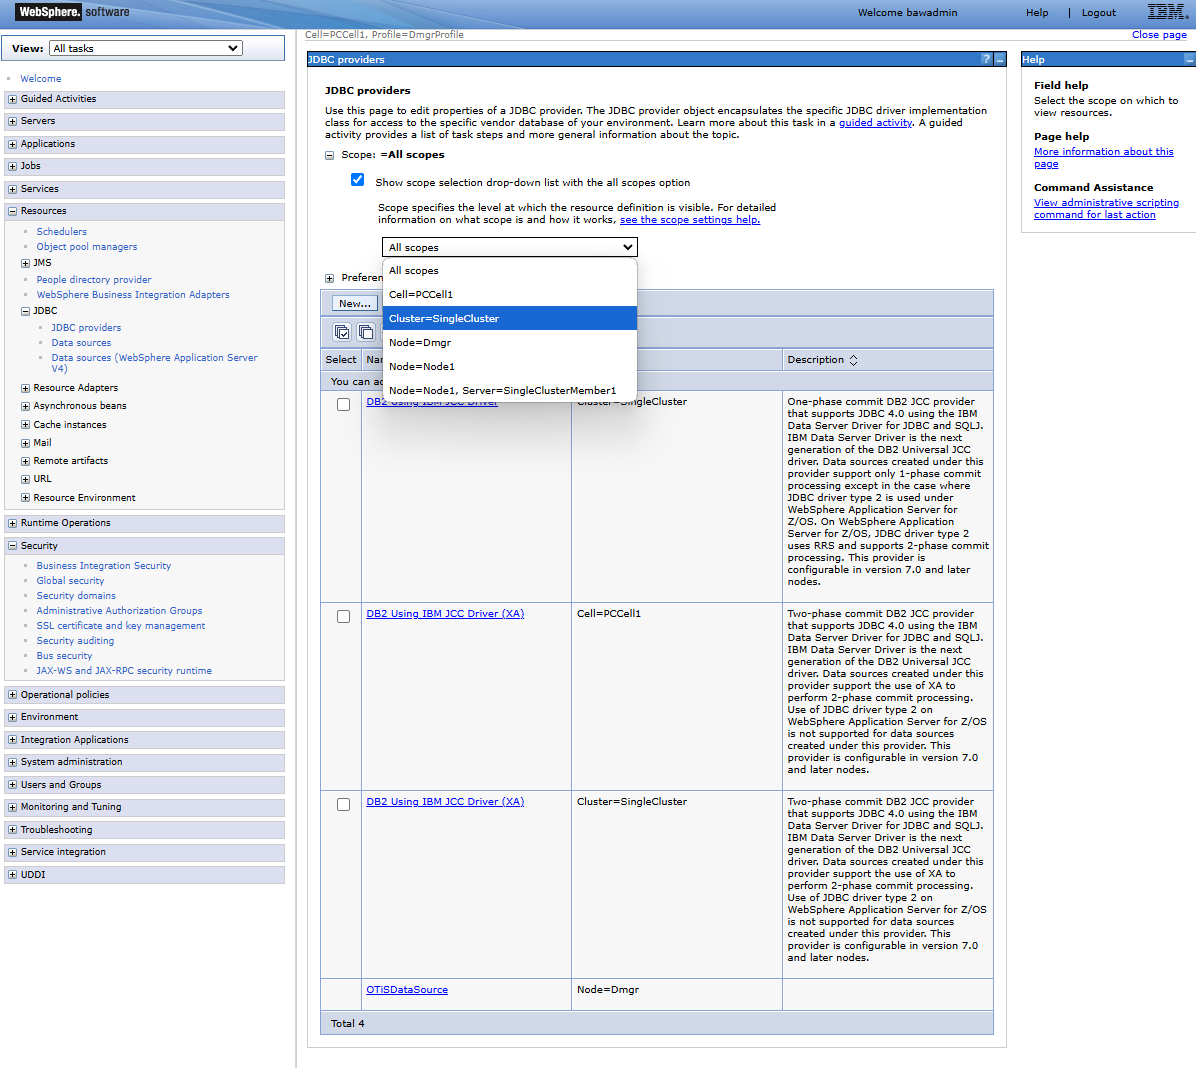
To configure a JDBC data source for PostgreSQL, we first need to define a JDBC provider. Go to the JDBC service provider configuration form: Resources > JDBC > JDBC providers. Select the scope (area) containing the provider being created, e.g. Cluster=SingleCluster. If the JDBC provider definition for PostgreSQL databases does not exist, we need to create a new one - we run the wizard for creating a new provider.
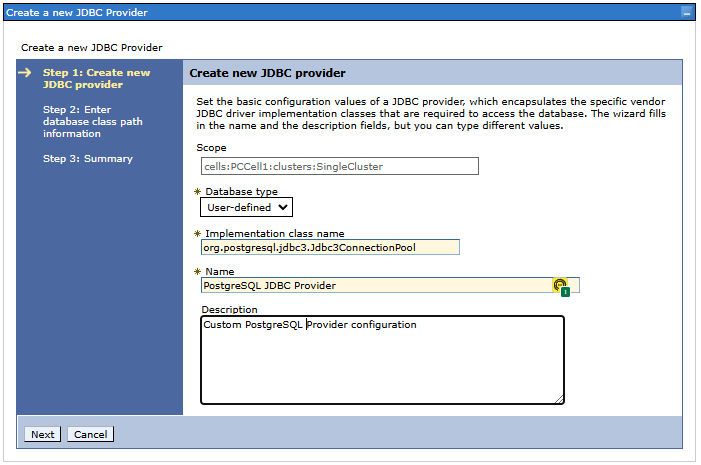
Step 1. Creating a new JDBC provider
- Select the database type - there is no PostgreSQL server on the list - select "User-defined"
- Implementation class name (amg. Implementation class name):
org.postgresql.jdbc3.Jdbc3ConnectionPool - Name: - the name of the provider - we will use it later when defining the JDBC source. Set the value that corresponds to us, e.g.
PostgreSQL JDBC Provider - Description: - optionally enter a description of the provider being defined.
Step 2. Defining the path to the library with the JDFBC driver implementation
Class path: full path to the loaded library with the PostgreSQL driver, e.g.: /opt/IBM/BPM/v8.5.5/jdbcdrivers/PostgreSQL/postgresql-43.3.2.jar

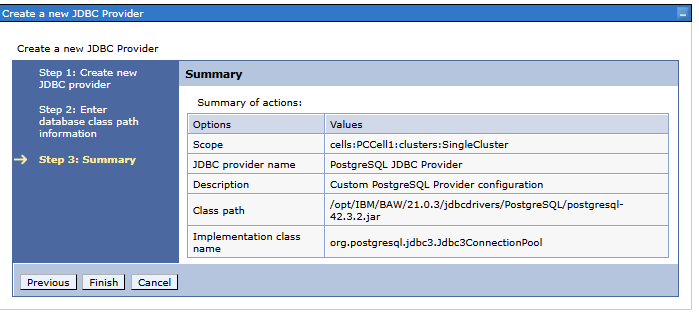
Step 3. Summary
We finish creating the data source by pressing the Finish button.
Data Source Definition
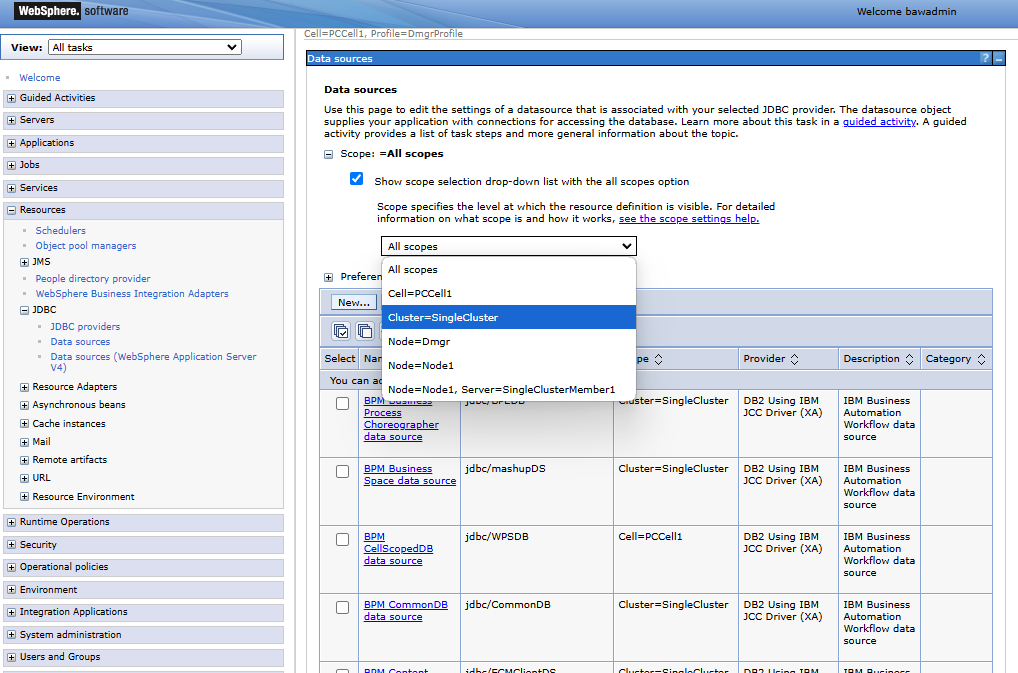
Go to the JDBC data source configuration form. Go through the following path (starting from the left-hand menu): Resources > JDBC > Data sources. Select the scope (area) containing the provider being created, e.g. Cluster=SingleCluster. Create a new data source for the database of interest (unless it exists) - the wizard for creating a new data source starts:
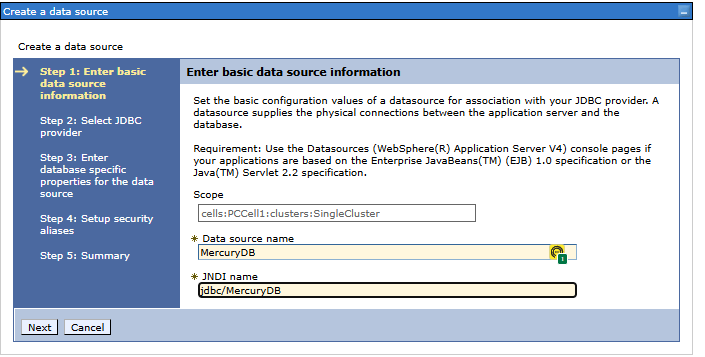
Step 1. Basic data of the data source
- Data source name - the name of the data source, e.g.
PostgreSQL DataSourceorMercuryDb- the name is optional, it is important that it clearly represents the meaning/use of this data source - JNDI name - the JDNI name under which the data source is to be bound, e.g.
jdbc/SamplePostgreSQLorjdbc/MercuryDB- this name is used in web applications to retrieve a given data source.
Fragment of an example implementation of referencing a JNDI name in an application (Java language):
InitialContext ctx = new InitialContext();
Connection conn = ctx.lookup("jdbc/MercuryDB");
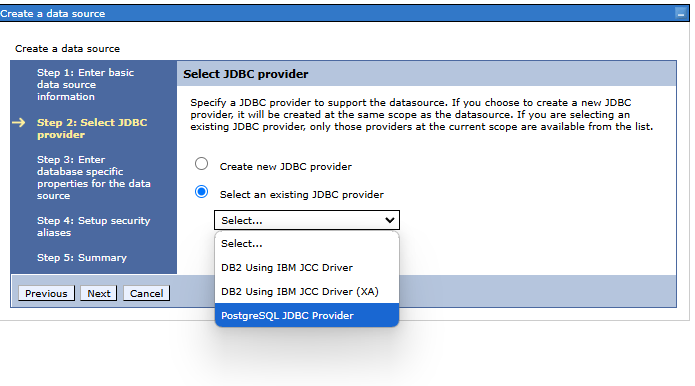
Step 2. Select JDBC provider
On the form, check the radio box Select an existing JDBC provider. From the list, select the name1 of the previously created JDBC provider, e.g.: PostgreSQL JDBC Provider.
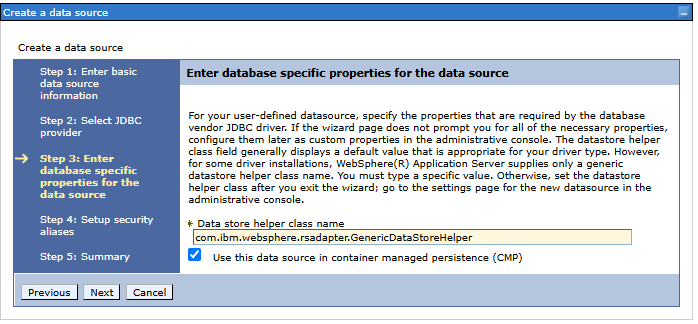
Step 3. Select Data Store Helper Class Name
Set Data store helper class name: com.ibm.websphere.rsadapter.GenericDataStoreHelper.
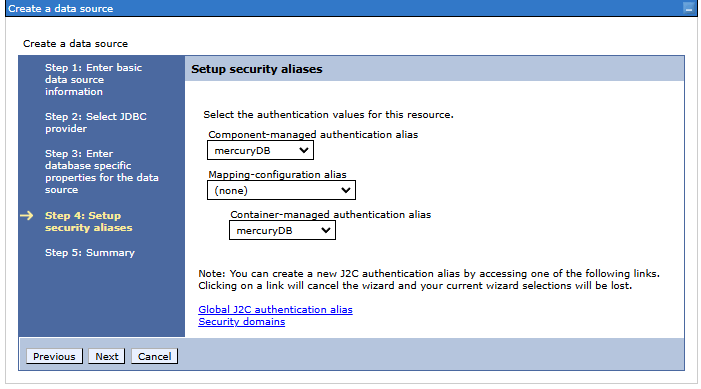
Step 4. Security settings
- Component-managed authentication alias: we select the name of the JAAS alias we created earlier
- We do not fill in the values of the remaining fields...
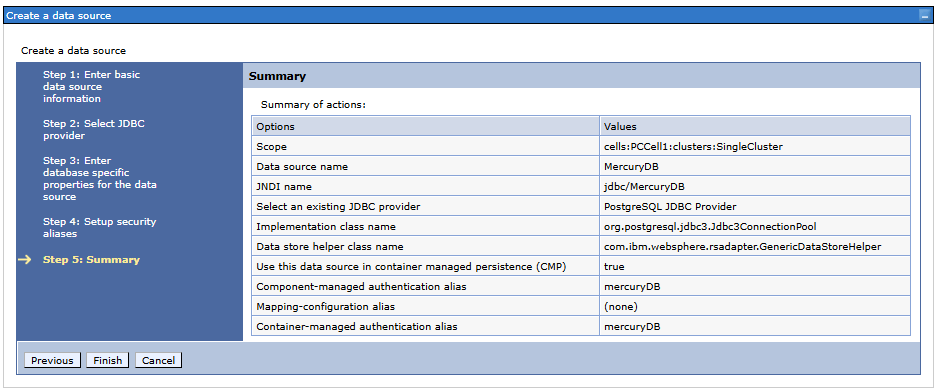
Step 5. Summary of the data source being created
Summary and the Finish button.
Database connection configuration in the data source
We have created a data source, but we have not yet added the appropriate database details (we have not provided the host name, port number, or database name anywhere). After saving the information from the wizard, the new data source will appear in the sources table.
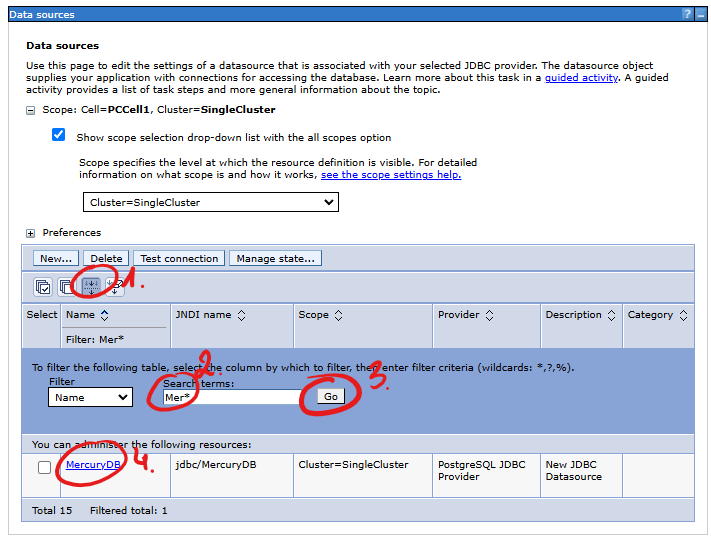
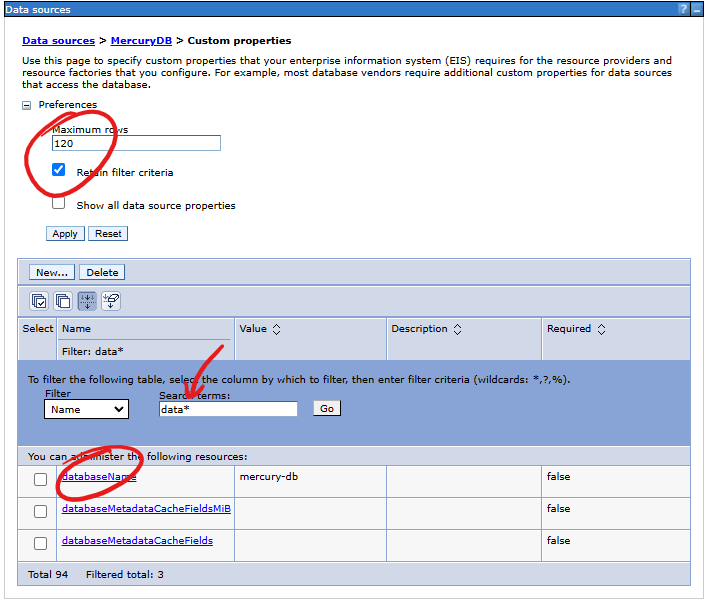
The above illustration shows the steps of using the data search mechanism in the table to find the data source definition that interests us:
- Show the data filter form.
- Enter the searched data source name - enter the full name or a fragment using the asterisk (
*) as a "wildcard" criterion, e.g.Mer*. - Press the Go button to start the search.
- You will find the searched item in the table.
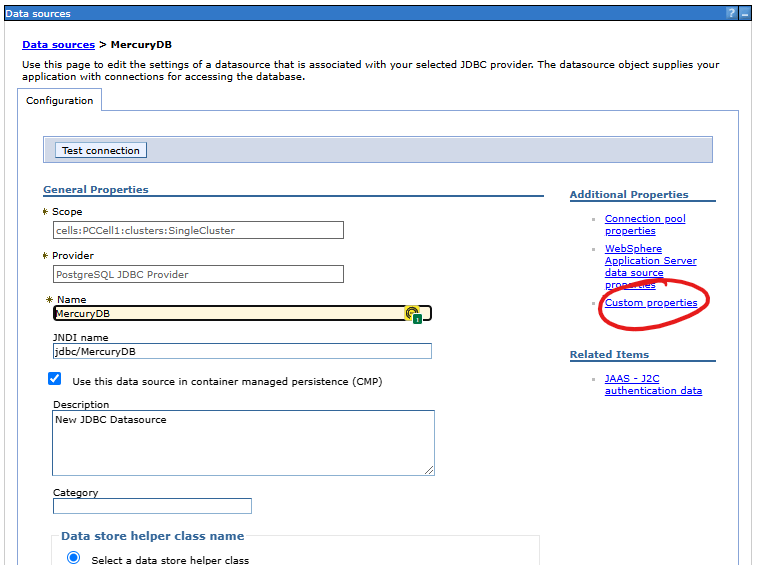
Click on the item with the name of the data source you just created and go to the edit form. After opening the data source definition form, search for and click on the Custom properties link:
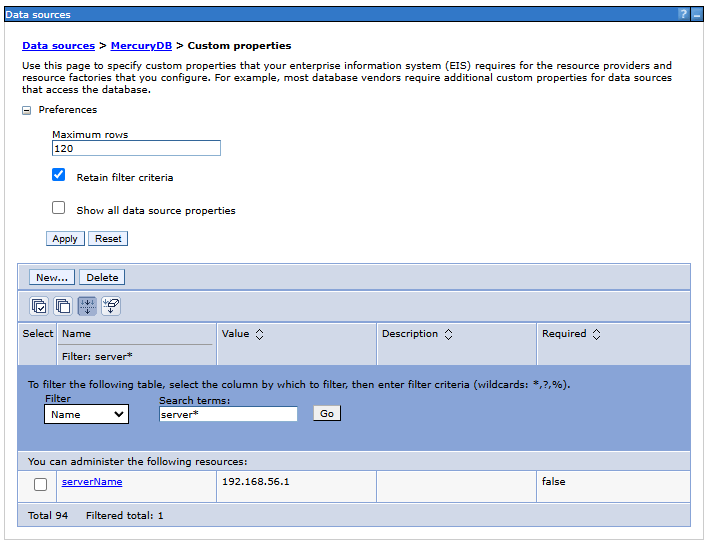
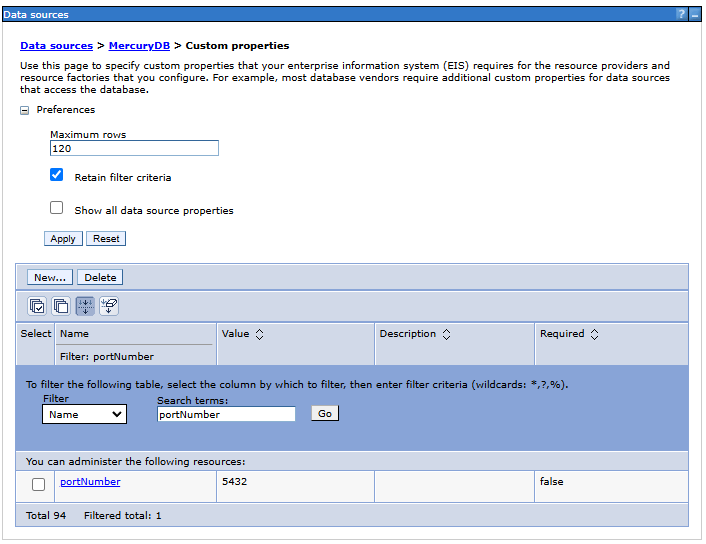
In the list of parameters, we search for those that are responsible for defining the connection to the database, i.e.:
databaseNameto the appropriate value indicating the name of the database. Example for the name of the Mercury database:mercury-dbserverName- the name of the database server or its IP, e.g.192.168.0.12portNumber- the listening port number of the database server service, e.g.5432
Use the data filtering mechanisms in a table to find the parameters that interest you faster.
- databaseName
- serverName
- portNumber
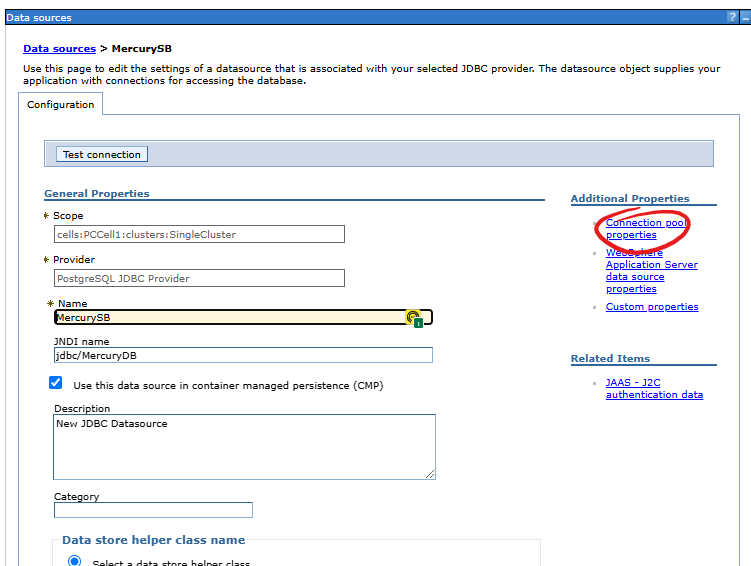
Additional Connection Pool Parameters
It is worth remembering to change the connection pool parameters. To do this, go to the data source edit form, click the Connection pool properties link.
It is worth taking into account the Aged timeout parameter.
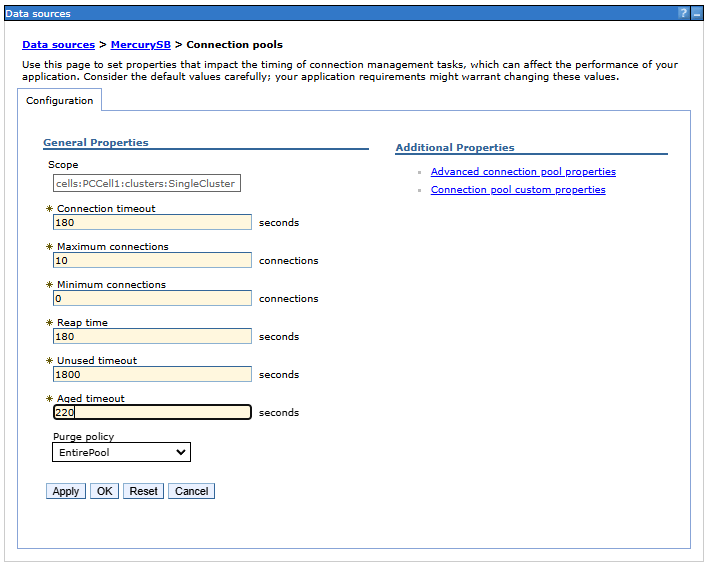
Age limit (Aged timeout)
According to the documentation, the value of the Aged timeout parameter should be greater than the value of the Reap timeout parameter and should be less than the lifetime of unused connections on the database server (in the case of PostgreSQL, this is determined by the wait_timeout parameter). If the Aged timeout parameter has a default value of zero, active connections in the pool may be closed by the database server, which will cause a database connection failure error when trying to use such a connection.
Testing the database connection
Of course, the configuration is intended to define a working connection between our web application and the database. We can verify the operation of the connection on the data source definition form. To run the connection test, press the Test connection button.
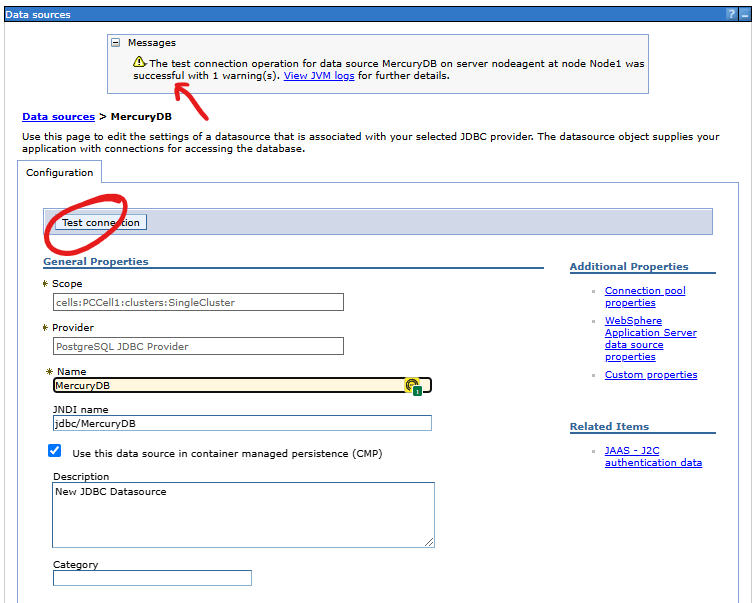
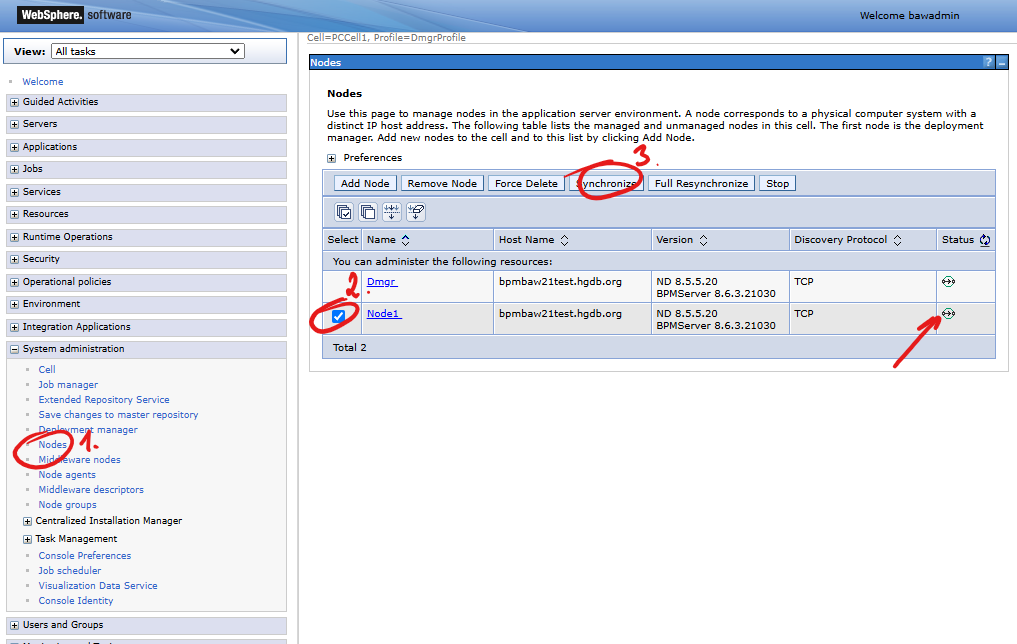
The test only works on the node server! For the connection test to work, the data source configuration must be on the node in which the source was created. Verify whether the configuration was synchronized to the node before starting the test, or manually invoke it yourself. (1) Go to System Administration > Nodes. (2) In from the list of nodes select the name of node you are interested and (3) press the Synchronize button. The status icon in the table shows whether the node data has been synchronized: